A Time To Share

Our God is a God of Nations:
"He so love the WORLD ... He gave His one and only son..."
Showing posts with label Chinese Dish. Show all posts

Sunday, 19 July 2020

CHINESE BRAISED PORK BELLY


Braised Pork Belly
紅燒肉
is a popular dish among the Chinese.

The pork belly melts in your mouth, 
fat but non greasy!

The sweet and savory sauce coupled with the tender meat
is simply irresistible!

It is best served with a bowl of steamed rice
and 
some freshly cut cucumber for the contrast in the texture!

Another way of eating is to add to a plate of boiled beehoon!

Chinese Braised Pork Belly
(A)
500g pork belly, with skin on, cut into large chunks
1 Tbsp cooking oil for frying

(B) 
1 bay leaf
1 star anise
6 cloves garlic, leave it whole with skin intact
1 stalk scallion, use the white part
5 slices old ginger
2 Tbsp Chinese cooking wine
1 & 1/2 Tbsp rock sugar
1 & 1/2 Tbsp light soya sauce
1 Tbsp dark sauce
1/4 tsp pepper
2 cups water

Method:
1. heat up 1 Tbsp cooking oil in a frying pan
2. sear or fry the pork belly, to lightly brown all the sides


3. remove from heat and place in the pressure cooker
4. add the rest of the ingredients and cook until the meat is tender.


Note:
If the gravy is too much, cook it over the stove to reduce

Sunday, 5 July 2020

EGG TOFU


EGG TOFU


Simple ingredients
and packed with goodness.

Easy to make
and can be cooked in any way,
either steamed, fried or braised as you like it to be done!

Egg Tofu
3 eggs
250g soya bean milk
1/4 tsp salt

1) beat eggs, add soya bean milk & salt
2) strain into a steaming dish, remove any bubbles
3) steam until set, 8-10min
4) leave to cool before cutting

COPYCAT SALTED BLACK BEAN FISH


豆豉鲮鱼
Canned Fried Dace With Salted Beans
is
a traditional dish,
popular among the Chinese.

It is best served with a bowl of steamed rice
or porridge.

I name this 
Copycat Salted Black Bean Fish.

If you would like to try making, these are the ingredients:


Copycat Salted Black Bean Fish
4 fish, palm size, cleaned & marinate with a little salt
oil for deep frying

2 Tbsp hot oil
2 Tbsp garlic, minced
1 Tbsp old ginger, minced
3 Tbsp sugar
1-2 Tbsp dark soya sauce (depend on your liking)
100g salted black beans, rinsed once
water, enough to cover the fish

Method:
1. fry fish until crispy and nice, remove & place in a pressure cooker
2. remove the hot oil from the kuali and leave 2 Tbsp oil to cook the sauce
3. add ginger & garlic to fry until fragrant
4. add black beans & some water
5. add the rest of the ingredients & enough water to cover the fish
6. when it starts to boil, remove from heat & pour onto the fish
7. make sure you have enough water to cover the fish
8. pressure cook until ready

Tuesday, 30 June 2020

STICKY PORK RIBS


糖醋排骨
STICKY PORK RIBS

These sweet and sour sticky ribs are full of flavour.
Yes, the meat almost fall off the bones!
So good that you will ask for more.
Thank you Nellie Bok for sharing this recipe.

Sticky Pork Ribs
500g pork ribs
1 tsp bicarbonate soda

Marinate 
2 Tbsp corn flour
1/4 tsp salt
1 tsp minced garlic
1 tsp oyster sauce
1/4 tsp chicken powder
1/4 tsp black pepper powder
1 Tbsp cooking oil

1 Tbsp cooking oil
175g black vinegar ( adjust to your taste)
75g rock sugar
1 Tbsp dark soya sauce
Boiling water, enough to cover the ribs

Garnishing (optional)
1 tsp toasted sesame seed
cut cucumber

Method:
1. marinate pork ribs with bicarbonate soda for 30 min to soften the meat texture.
2. rinse well with plenty of water, pat dry with kitchen paper towels
3. add the marinate ingredients to marinate for at least 20min
4. heat pan, add 1 Tbsp cooking oil and lightly fry both sides of ribs
5. add the rest of the ingredients & bring to a rolling boil for 2-3 min
6. reduce heat to simmer until tender
7. check constantly & flip for even coating
8. about 35-40min the gravy will thicken and emulsified.
9. adjust the flavour to your liking
10.serve hot with toasted sesame & crunchy cucumber slices


Wednesday, 13 May 2020

SOFT BOILED EGG

Soft boiled Egg 溏心蛋


Wow! 
The egg yolk flows out like cream, so yummy!

Many of us like soft boiled eggs like this,
but often times we left it too long in the boiling water
And it becomes hard boiled egg instead.

I found this chart when I googled for soft boiled eggs
It is helpful if you are a first timer!

Method:
1. bring water to a boil
2. add eggs & let boil for 6min
3. remove & put into ice cold water
4. do not de-shell until required

HOMEGROWN BEAN SPROUTS


Do you like beansprouts?
I do, especially those cruncy ones!

Some say Ipoh produces the best beansprout!
How far is this true?

Well, if you are not from Ipoh,
try this recipe to confirm otherwise. 


I have 75g of green beans in my pantry.

Let's start...

How to grow beansprouts?

Carolyn Chan advised to grow it in a kettle because:
1) can rinse the beans easily
2) the spout of the kettle prevents the beans from coming out when rinsing
3) no need & should never try to open the cover to peep inside

Method:

1st Day: soaking
wash the beans & soak them in the kettle overnight

2nd Day: Rinsing 2-3 times
1. rinse beans by pouring out the water through the spout
2. fill water through the spout also,
3. shake GENTLY to make sure all the beans are rinsed, drain the water

3rd Day: repeat the rinsing process 2-3 times

4th Day: Harvesting
Open the kettle cover
and
you see this!
Fat fat tau geh, haha!


1. in the morning, prepare a basin 1/2 filled with water
2. pour the beansprout into the water
3. use your hand to shake the water, some husk will rise to the top, remove them
4. take a handful & clean it & put into another basin of water
5. look at these, perfect for eating - white & crunchy


Tips:
1. do not add salt to beansprout when you fry because it will lose its crunchiness.
2. best method is to run it into a pot of boiling water, then season with prepared sauce.

Sauce: mix together
2 tsp garlic oil
2 tsp light soya sauce
1/2 tsp sugar
2 tsp boiling water
dash of pepper
with 75g green beans
I made 2 plates like this!


BRAISED SEAFOOD


Braised Seafood

This is an elaborate seafood dish,
not to be missed, especially during celebrations and festive seasons.
It was my late mom's favourite.

There is a variety of seafood used.
Many of these need tedious preparation.
Luckily all these can be prepared well ahead of time.

Sea Cucumber - takes 3-4 days to prepare
1. pour boiling water over the sea cucumber and soak overnight
2. next day, change the water & bring it to a boil, leave to cool
3. need to repeat (2) until the sea cucumber is soft enough to slit open
4. slit open the sea cucumber & clean the inside
5. boil in clean water again, cover & leave to cool
6. repeat (5) until the texture is right for cooking
7. once done, freeze the sea cucumber until required

Chinese Mushroom - 1 day ahead
1. soak the mushroom overnight
2. next day, drain and cut away the stems
3. add clean water to boil or steam until soft

Dried Scallop - 1 day
1. clean & steam the scallop with water until soft
2. freeze in its water

Fish Maw (I used fried ones) - prepare the same day
1. soak in hot water to soften
2. cut into bite size

Roast Pork
used for added flavour & fats (makes the mushroom soft & smooth)

Chicken Broth

Canned Abalone
1. open when ready to serve
2. keep the water & slice the abalone, or cut into cubes
3. no cooking required as cooking will toughen it

To bring together:
1. in a claypot, heat up a little oil
2. fry some whole cloves of garlic & few slices of ginger
3. add a few pieces of roast pork to fry
4. add the rest of the ingredients
5. pour in chicken broth, and bring to a boil
6. add abalone water from the can
7. taste & adjust the flavour with oyster sauce & dark soya sauce
8. if your prefer thick soup, add some corn flour mix with water to thicken
9. mix in the sliced or cut abalone to serve

Sunday, 15 March 2020

CLEAR VEGETABLE SOUP

Clear Vegetable Soup

I love soups
Someone mentioned that Foochow people like soups.
Indeed, most Foochows have a bowl of soup on the table during meal times.
I am one that never miss.

We like to boil soups with chicken or pork or bones
because it makes the soup tasty and nutritious.

Recently Kelly Yip posted a vegetable soup
and she said that it was yummy.

I was curious and the next day I boiled one for myself
using the vegetables that I have in the house.
I find that the soup is clear,
sweet and tasty, minus the fats!

Perhaps you may like to try boiling one too.

Clear Vegetable Soup
2 carrots, cut in wedges
1-2 corn, cut to the size you can hold if you want to eat it
2 dried mushrooms, washed & halved
some red dates, sliced open 

1. everything into the slow cooker
2. add the amount of water you want
3. boil for 2 hours, 1 hour on HIGH & another on LOW
4. serve slightly cooled

Monday, 23 December 2019

OLD CUCUMBER SOUP


Old cucumber soup 
is a popular home remedy to cooling the body in general.

It helps to soothe throat irritation and coughs,
and some even believe in its anti-aging benefits.

Old cucumber soup 
is generally acceptable in its taste
for children and adults alike.

The method of preparing this soup is quite simple too.
Simply get all the ingredients above,
cleaned and cut accordingly.
Then, put all into a pot of boiling water
and simmer for an hour or two,
a pot of steaming old cucumber soup is ready to be served!
Enjoy!

Sunday, 1 September 2019

YELLOW WINE CHICKEN


黄酒雞
Yellow Rice Wine Chicken
is a well loved dish among the Chinese
especially the ladies!

It is a dish fit for new mothers.
It helps to expel 'wind' from the body and keeps it warm.

The ingredients are simple but the taste is really good.


Yellow Wine Chicken

1 chicken thigh, chopped into pieces
10 slices old ginger
some black fungus, soaked & cut into strips
1/2 Tbsp sesame seed oil
150ml rice wine, can be less
200ml water

1) fry ginger in sesame seed oil until fragrant
2) add chicken pieces and black fungus to fry
3) add rice wine when the chicken pieces start to shrink
4) add water, cover and bring to a boil
5) when chicken is soft, add salt to taste.
6) serve hot!

Monday, 19 August 2019

SHANGHAI PANCAKE


Shanghai Pancake
was once very popular. 

It was usually served together with a sweet cold dessert 
at the end of a heavy 8 course dinner in a Chinese restaurant.

This recipe is adapted from dingoozatfood.blogspot.com 

(A) sift together 
90g All Purpose Flour
30g Rice Flour
1/2 tsp Baking Powder
2 tsp Sugar 
1/4 tsp Salt

(B) Combine
1 large Egg
230g Water

~~~~~~~~~~~~~~~~

250g red bean paste or lotus bean paste.
Cooking Oil

Method
  1. Add B to A, mix well and strain through a sieve
  2. Lightly oil a non stick frying pan
  3. Heat up the pan. 
  4. Pour 1 ladle batter into the pan, swirl to form a thin pancake 
  5. Once set, remove from pan and spread filling onto the pancake (do not press in the filling)
  6. Fold into rectangle by folding in the 4 sides, Brush some batter on the sides to secure the edges
  7. Heat some oil in the pan, pan fry the pancake until golden brown on both sides. Dish out and drain the excess oil. Cut into pieces and serve 

Thursday, 25 July 2019

LUFFA SPONGE GOURD

Luffa Sponge Gourd

Are you familiar with this Sponge Gourd?
Those days many of us have a plant at the fence in the backyard.
The endless supply of the gourd
provides a soupy egg dish regularly on the dining table.


So much so that many of us got tired of it!
My hubby is one of those who does not like it anymore!

I still like it, haha!
So whenever I stumble on it, I will buy one for myself.
I can only cook 1/2


Last time, we had a plant at the backyard.
When it bloomed, it was such a beautiful sight-
blooming bright yellow flowers with so many gourds hanging down!
So much fruits that we had to give away.
Those that were left hanging on the plant just withered and dried up.

When we removed the dried skin and the seeds
we have a supply of sponge for use.

Friday, 28 June 2019

FRIED CUCUMBER EGG


Fried Cucumber Egg
is a simple dish
having different textures in one dish!

These are the ingredients:


Fried Cucumber Egg
1 small cucumber
1 egg, beatened
some dried cloud ears, soaked, cleaned & cut smaller
2 garlic, mashed with chopper
1" carrot, sliced thinly
1 Tbsp cooking oil
oyster sauce
salt & sugar to taste

1) wash cucumber, slice off part of the skin
2) cut lengthwise into 1/4, slice away the seeds & cut diagonally
3) heat up a little oil & fry the egg, remove from heat & cut into smaller pieces
4) heat up remaining oil & fry garlic until fragrant
5) add cucumber, cloud ear, egg and carrots to fry
6) add some water & allow to simmer little while
7) add seasoning & dish up.

Note:
Do not cook the vegetable too long as it will be soften!

Monday, 24 June 2019

EASY BRAISED CHICKEN FEET NOODLE


Braise chicken feet noodle looks yummy and complicated.

No worry,
braising chicken feet is not too difficult afterall if you know the way.

The beauty of it, is you can braise it and keep it for the next day.
In fact it tastes better after sitting in the fridge.

This is the braise chicken feet prepared ahead


Do you like a no fuss recipe?

Easy Braised Chicken Feet
7 pairs chicken feet, cleaned & chopped 1/2
3 mushrooms soaked overnight & 1/2ed or 1/4ed
2 sea cucumber, soaked and cleaned & softened
2" cinnamon sticks
3 star anise
5 dried chillies
1 large clove galic, whole wedges
few slices ginger
some pepper seed
soya sauce, salt & sugar to taste
dark soya sauce for colour

1) heat up a little oil in a pot, fry the ginger until fragrant
2) add mushroom and sea cucumber & briefly fry
3) add enough water, allow to simmer until mushroom & sea cucumber are softened
4) add chicken feet and the spices and continue braising
5) when done, add soya sauce, both light & dark, salt and sugar to taste

Ideas to serve
1) I have opened a can of abalone to serve with it.
    Just slice the abalone & warm the pieces in the hot gravy.
    cooking it will toughen the abalone!
2) pour the braised chicken feet over the plate of cooked noodle.
    Remember to sprinkle some fried shallots and spring onions for added flavour

Tuesday, 28 May 2019

TAMARIND CHICKEN


Tamarind Chicken
has a sweet and sour taste
with aroma of turmeric and not spicy!

Do not forget to cook more rice as it is very appetizing.

I have adapted this recipe from
Shirley Ong Geok Mooi's Assam/Tamarind Chicken.

Tamarind Chicken
2 chicken drumstick, chopped into bite size
2 Tbsp oil
1 big lemongrass, smashed
1/2 tsp tamarind paste
sugar & salt to taste

Rempah:
blend together
1-2 dried chilli, soaked in boiling water to soften
8 shallots
4 pips garlic
3/4" fresh fresh turmeric

1. heat up oil in a kuali, add the rempah & fry until fragrant
2. add lemongrass & chicken pieces, fry until chicken pieces shrink
3. add some water and allow to simmer until cooked
4. add tamarind paste, salt & sugar to taste

Note:
I have replaced the fresh turmeric with turmeric powder
so the colour is not so bright.

Monday, 27 May 2019

TONKIN JASMINE

Tonkin Jasmine
Scientific name: Telosma Cordata
is commonly known as
夜香花 or 夜来香
in Chinese


It is said in www.huabaike.com that it could improve vision,
reduce eye redness and irritation.


It is a flower but usually cooked and eaten as a vegetable.
It is only available from May to August every year.

2 common methods of cooking is
1) fry with egg
2) boil soup with minced pork

Sunday, 26 May 2019

BRAISED SOUR PLUM PORK KNUCKLE

Braised Sour Plum Pork Knuckle
is an appetizing dish to go with steamed rice.


Braised Pork Knuckle
with Sour Plum


Some like to use the soaked plum sold in bottles
but I prefer the taste of dried sour plums.

This one I have added dark soya sauce!


Braised Sour Plum Pork Knuckle
450g pork knuckle, chopped
4 sour plum
1 Tbsp light soya sauce
dash of dark soya sauce for colour ( I added more because my hubby likes it dark)
1/2 tsp sugar, optional
1 Tbsp cooking oil
Either 3 sprigs of spring onions, cut into 1" lengths
           or 1 large onions, sliced

1.  pour boiling water over the pork knuckle pieces to remove smell and dirt.
2.  soak awhile then clean in running water.
3.  heat oil in a pot , add the white part of spring onions to fry
4.  add pork knuckle pieces to fry until shrink.
5.  add sour plum and enough water to cover the pork
6.  bring to a boil, then reduce heat to simmer for 30min
7.  add soya sauce and sugar to taste
8.  when meat is soft enough, add spring onions and dark soya sauce if necessary
9.  allow to sit until ready to serve.

Note:
1. Colour should be light, but I have added more because my hubby likes it dark.
    Dark colour will affect its taste!
2. The gravy should have boiled down to just enough to cover the bottom of he bowl.

ZUCCHINI SALTED EGG SOUP

Zucchini
a summer squash,
is a member of the gourd family.

I have extracted this from Pinterest to share:


These are sold either in green or yellow.
I have bought the yellow one.


Thank you Jessie Tee for introducing to me
Zucchini Salted Egg Soup
I have adapted the recipe from wendyinkk.blogspot.com


 These are the ingredients:


Zucchini Salted Egg Soup
1 Zucchini 7" long, cut itno 5mm thick strips
1 salted duck egg, white & yolk separated
3 slices old ginger
3 sprigs spring onions, cut into 1" lengths
20-50g glass noodles, soaked

1. heat up a wok/pot with 1 Tbsp oil
2. fry ginger until fragrant
3. add zucchini sticks & fry until sticks wilt
4. add in 1L water and bring it to a boil
5. add salted egg yolk to cook, turn the heat to medium low
6. after 2 min, fish out the egg yolk & slice thinly or chop it
7. add glass noodles
8. when zucchini is soft, drizzle salted egg white into the soup, stirring at the same time
9. season with salt, pepper and chicken cube if necessary
10. add salted egg yolk pieces, spring onions
11. serve hot

Note:
1. Zucchini can be replaced with any member of the gourds family.
2. feel free to mash the yolk in its white before drizzling into the soup 

Sunday, 19 May 2019

PICKLED VEGETABLE


PICKLED VEGETABLE
is easy to prepare and nice to eat.

So colourful and appetizing that you would like to have a 2nd helping.

It is best served in a barbecue or buffet
where meat is plenty and vegetables are few.
It is so refreshing to take a bite into it!

I have tried making this sweetened with honey.
It is yummy, but 1/2 your bottle of honey is gone!

Perhaps you can try this basic recipe & do the adjustments next time.

Pickled Vegetable
1 cucumber
1/2 carrot
1 big onion
1/4 pineapple
1 red chilli
1/2-1 lemon, juiced
4 Tbsp sugar

1. peel away part of the skin from the cucumber, and cut it into 1/4s lengthwise.  Slice away the     seeds, then slice diagonally.
2. slice carrots into thin strips
3. combine cucumber & carrots, marinate with salt
4. slice thinly onions and chilli
5. cut pineapple into pieces
6. when cucumber is soft (about 15min), wash away the salt & squeeze dry
7. combine cucumber, carrots, onions, chilli and pineapple in a big bowl
8. add sugar and lime juice, adjust to you liking. Toss or mix with chopsticks
9. let sit for 15min and chill before serving

Notes:
1. lemon juice can be replaced with apple cider or vinegar
2. sugar can be replaced partially with honey
3. feel free to adjust the taste to your liking

Wednesday, 3 April 2019

YELLOW GLUTINOUS RICE WINE


黃酒
Yellow Glutinous Rice Wine
is 
commonly used in Chinese Cooking
especially for ladies during confinement.

It is said to strengthen the body immune system
and help to expel wind in the body.

My late mom-in-law said that it is cooling
so need to add ginger to take effect!

I wish to express my special thanks to
Loke Peng
for sharing her mom's secret recipe
which is in gantang, measured with condense milk tin.

I omitted
the little red yeast (for slight pinkish colour) in the recipe.

I have adapted as follows:


Yellow Glutinous Rice Wine

Ingredients:
550g glutinous rice
3 wine yeast biscuits (1 hot & 2 sweet)

Method:
1. cook glutinous rice in a rice cooker and leave to cool completely overnight
2. crush the wine biscuits until fine
3. sprinkle some yeast biscuits at the base of the bottle
4. mix the rice with the yeast, leave some for later use
5. fill the bottle with the rice mixture, press down
6. use bottled water to clean off rice from container and pour into the bottle too
7. sprinkle the remaining yeast on top
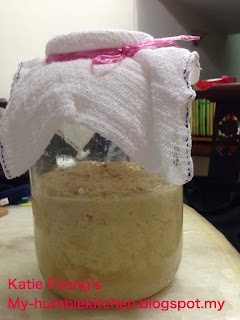
8. cover the bottle with a piece of cloth and secure with a string
9. place the cover on top of the bottle, no need to screw on
10. leave in a cool corner, for 30 days

Harvest:
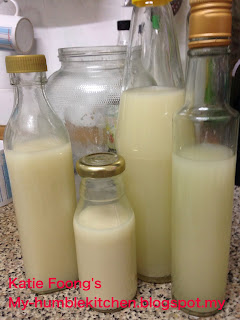
11. strain the wine through a muslin cloth or bag
12. collect the wine to fill into bottles.

Note:
1. utensils and bottles need to be thoroughly cleaned and dry
    to avoid contamination. 
2. discard the residue