A Time To Share

Our God is a God of Nations:
"He so love the WORLD ... He gave His one and only son..."
Showing posts with label Biscuits. Show all posts

Monday, 15 March 2021

Ipoh Famous Meat Floss Biscuit


Ipoh Famous Meat Floss Biscuit

This is yet another copycat recipe
using the traditional Chinese Pastry recipe

The bean paste that I cook is slightly brown
whereas those sold in the shop is green (pandan flavour)

As for the floss
you can either use pork or chicken or even salmon floss!

Salted egg yolk can be left out if you do not fancy.

Enjoy...


Ipoh Famous Meat Floss Biscuit
makes 12

Filling:
       100g mung beans, soaked overnight
       40g sugar
       1/2 tsp salt 
       22g oil

Pastry:
 (A) 100g all purpose flour
        25g oil
        15g sugar
        50g water
         1/4 tsp vinegar

(B) 90g all purpose flour
      50g shortening

Other ingredients:
3 salted egg yolk, steamed & cut each into 1/4 
75g meat floss
Egg wash: 1 egg yolk+ 1 tsp water

Method:

Filling:
1. Steam the mung beans until soft (about 30min)
2. While the beans are still warm, blend with some oil
3. Heat the sugar and the remaining oil in a non stick pan, to caramel 
4. Add the blended beans and fry until the mixture comes together,
5. Remove and let cool.
6. When cooled divide into 16g each ball

Pastry:
1. Separately blend ingredients in A and B
2. Divide A into 18g each
3. Divide B into 8g each
4. Wrap B into A, leave aside and continue doing for all the 12
5. Take 1 ball, press down & roll lengthwise into a strip
6. Roll the strip up, like a Swiss roll, leave aside & do the same for the remaining balls
7. Take 1 cylindrical dough, press down and roll lengthwise & roll up like a Swiss roll again.

To assemble:
1. Wrap egg yolk in a ball of bean paste
2. Drop into the meat floss, until required
3. Take 1 pc dough, press down and roll flat into a round
4. Put the ball of bean paste in the centre of the dough, add 1-2 tsp of floss 
5. Gather the sides to wrap the filling securely
6. Place the ball, smooth side up, on the parchment lined pan
7. Egg wash before sending into the oven
8. Bake 25min in 180’C 


Friday, 29 January 2021

TAMAGO BORO or LITTLE MANTOU

TAMAGO BORO 

Or 

LITTLE MANTOU 


Is good as a snack for the little ones
Can ask the little ones to join in the fun of making these little balls 


Sharing the recipe by Kenneth Goh

Ingredients:
120g potato starch
10 g corn starch
55g milk powder
25g icing sugar
1 egg
1/2 tsp baking powder

1. Beat egg together with icing sugar until sugar dissolved
2. Sift in the dry ingredients in 3 additions
3. Mix well with a spatula, the dough should be pliable
4. Form Into little balls and place on parchment lined baking tray
5. Bake in preheated oven 170’C for 15min
6. Let cool, and store in air tight containers.

Notes:
1. If the dough gets dry after awhile, sprinkle a little milk to bind
2. Wet your fingers if the dough starts to stick to your fingers
3. Perhaps the best size is a little bigger than soya beans if you want it crispy 

Sunday, 12 January 2020

WHITE ALMOND BISCUITS


White Almond Biscuits
is so fragrant and nice that you cannot stop at one!

It is sold very expensive too.
How about rolling up your sleeves and make a tray for yourself?

It is not that difficult afterall:

White Almond Biscuits

(A) 100g plain flour
      100g corn flour
      45g icing sugar
       
(B) 90g almond flakes, baked in preheated oven 150'C for 10min, turn once
      90g-100g corn oil (add just enough to combine)

Method:
1) sift ingredients in (A) together
2) mix in almond flakes
3) slowly add corn oil to combine the ingredients to form a dough
4) roll dough between 2 plastic sheets 
5) cut into shapes and arrange on a parchment lined baking sheet
6) bake in preheated oven 175'C for 30min

Monday, 28 October 2019

EGGLESS SCONES


Scones
are single serving biscuits or quick bread.

Guai Shu Shu introduced his Scones as
"Basic but presentable, 
Basic but irresistible raisin scones."

I like to call the scones he shared,
"Eggless Scones"

No 2 scones look the same, not to mention being beautifully shaped!
The rugged look tells you that the scones are well risen.

Notes to successful Scones baking:-
1) all ingredients need to be cold
2) the dough needs the minimum handling
3) if you add raisins or dried fruits, omit the sugar from the recipe

Eggless Scones
500g self raising flour, sifted with
2 tsp baking powder
50g sugar
1/4 tsp salt
100g cold butter, cubed & kept in fridge until required
300-350g cold milk

1) preheat oven to 210C
2) mix together all dry ingredients
3) rub the cold butter into the flour swiftly with your finger tips
4) add milk to combine the flour, do not pour in the milk all at once, but slowly.
5) when mostly combined, place dough on the table top & press to 1/2" height
6) cut into required shape (either smaller circle or a large circle & divide into wedges)
7) place on a lined baking sheet, brush the top with beaten egg or milk
8) bake for 20-min until golden brown

Sunday, 1 July 2018

EGG WHITE BISCUIT


Egg White Biscuits


Have you eaten these biscuits before?

During my childhood days
they weren't many types of biscuits to choose from.

We call these little yellowish round biscuits,
"Egg Yolk Biscuits"
because it has the shape and colour of egg yolk.

I was so excited when I saw the photo shared by Jong Shias Chin
and 
was told that Kenneth Goh shared this in his blog.

He discovered that these were made with egg white only!
Thank you Kenneth Goh.

Here it is:
Egg White Biscuits,
 to bring back the sweet memories of childhood days.....

Egg White Biscuits
100g cake flour
80g melted butter
60g icing sugar
2 egg white

1. using a whisk to mix together flour and melted butter, leave aside
2. whip egg white until foamy, gradually add sugar. Beat until stiff peaks
3. fold egg white into the flour carefully, until well combined


4. using a round nozzle, pipe batter onto a parchment lined baking tray,
    leaving some space in between to allow for expansion.
5. before sending into the oven, drop the pan onto the table to let trapped air escape
6. bake in preheated oven 160'C in the middle rack for 15-20min

Note: 
can bake it a bit longer to get a darker shade.

Sunday, 22 April 2018

SA KE MA


Sa Ke Ma
is a traditional snack/biscuit love by many.

It is sweet, crunchy and fragrant.

Lucinda Lau 
shares with us this recipe,
with simple ingredients of flour and eggs,
it is transformed into this wonderful snack!

Sa Ke Ma
(A) 150g flour
       2 eggs
       1/2 tsp baking powder
       1/4 tsp salt

(B) 80g sugar
      80g maltose
      40g water

(C) some toasted sesame seeds (optional)

Method:
1. sift flour & baking powder, add salt and mix well
2. beat eggs lightly in a bowl and add to sifted dry ingredients
3. knead together to form a dough, allow to rest for 20min
4. roll dough into a thin rectangle, divide into 1" sections
    and cut into 1/2cm strips, coat with flour if necessary
5. deep fry dough strips until golden, drain & leave aside
6. cook (B) over medium fire until sugar dissolves & thick bubbles formed.
    Continue cooking at LOW heat until-(To test, use chopstick to touch the syrup
    and lift up. If it forms a fine line, it is ready) 
7. Turn off heat, pour fried strips into sugar syrup and toss until well coated
8. add some sesame seeds and transfer to a oiled and lined 6" square pan
    & press while it is hot to compact, using a spoon 
9. leave for an hour before cutting into squares


Note:
Must really press and compact in order to get a nice firm cube!
I did not press mine hard enough!

Tuesday, 17 April 2018

GUANG SU BING


Guang Su Bing
光酥饼
that I remember was soft and sweet.

Guang Su Bing means clear and crispy biscuits.
I do not know why it has such a nice name
when its texture is hardly crispy!

It has a coat of flour on it,
otherwise with a thin layer of sugar crystal on it.

Special thanks to Guai Shu Shu
for sharing this recipe


Guang Su Bing
(I have adjusted to my taste buds)

100g self raising flour
40g castor sugar
30g milk powder
45g fresh milk
10g condense milk
18g cooking oil

1. sift together self raising flour & milk powder into a mixing bowl
2. add sugar and mix well
3. make a well in the centre of the dry ingredients, add milk, condense milk & oil
4. using a spatula, mix to combine the wet & dry ingredients. Do Not overmix!
5. divide dough into 6 portions. Shape each part into a ball.
6. press and shape it like a disc, place onto a lined baking tray
7. bake at the lowest rack, in preheated oven 160'C for 15min. 

Monday, 2 April 2018

LEMON TARTS

Lemon Tarts


Sy Yong from Oladybakes
takes pride in this simple 3 ingredients tart shell which is
crumbly and buttery inside,
and
crusty outside.

The filling is simply perfect,
Fragrant and flavourful.
The way I like it!


Tart Shell 
80g salted butter
130g plain flour
25g condense milk

Lemon Curd
2 large eggs
80g lemon juice
80g sugar
zest from 1 lemon
60g salted butter

Method:
1) cream butter & condense milk until light
2) add flour & mix into a dough, rest dough for 20min
3) press dough into tart pans, poke holes at the base with a fork
4) bake at 180'C for 18-20min, remove & cool on a rack
5) in a ceramic or glass bowl, stir to combine eggs, lemon juice, sugar & zest
6) place the bowl over a pot of water on the stove
7) heat gently over the pot of simmering water, stir constantly with a hand whisk
8) the mixture will become very foamy, and soon thicken like a gel, it is ready.
9) Remove from heat & cool for 5min
10) mix in butter, stir to mix well, 
11) spoon into tart shells & chill before serving

Wednesday, 19 April 2017

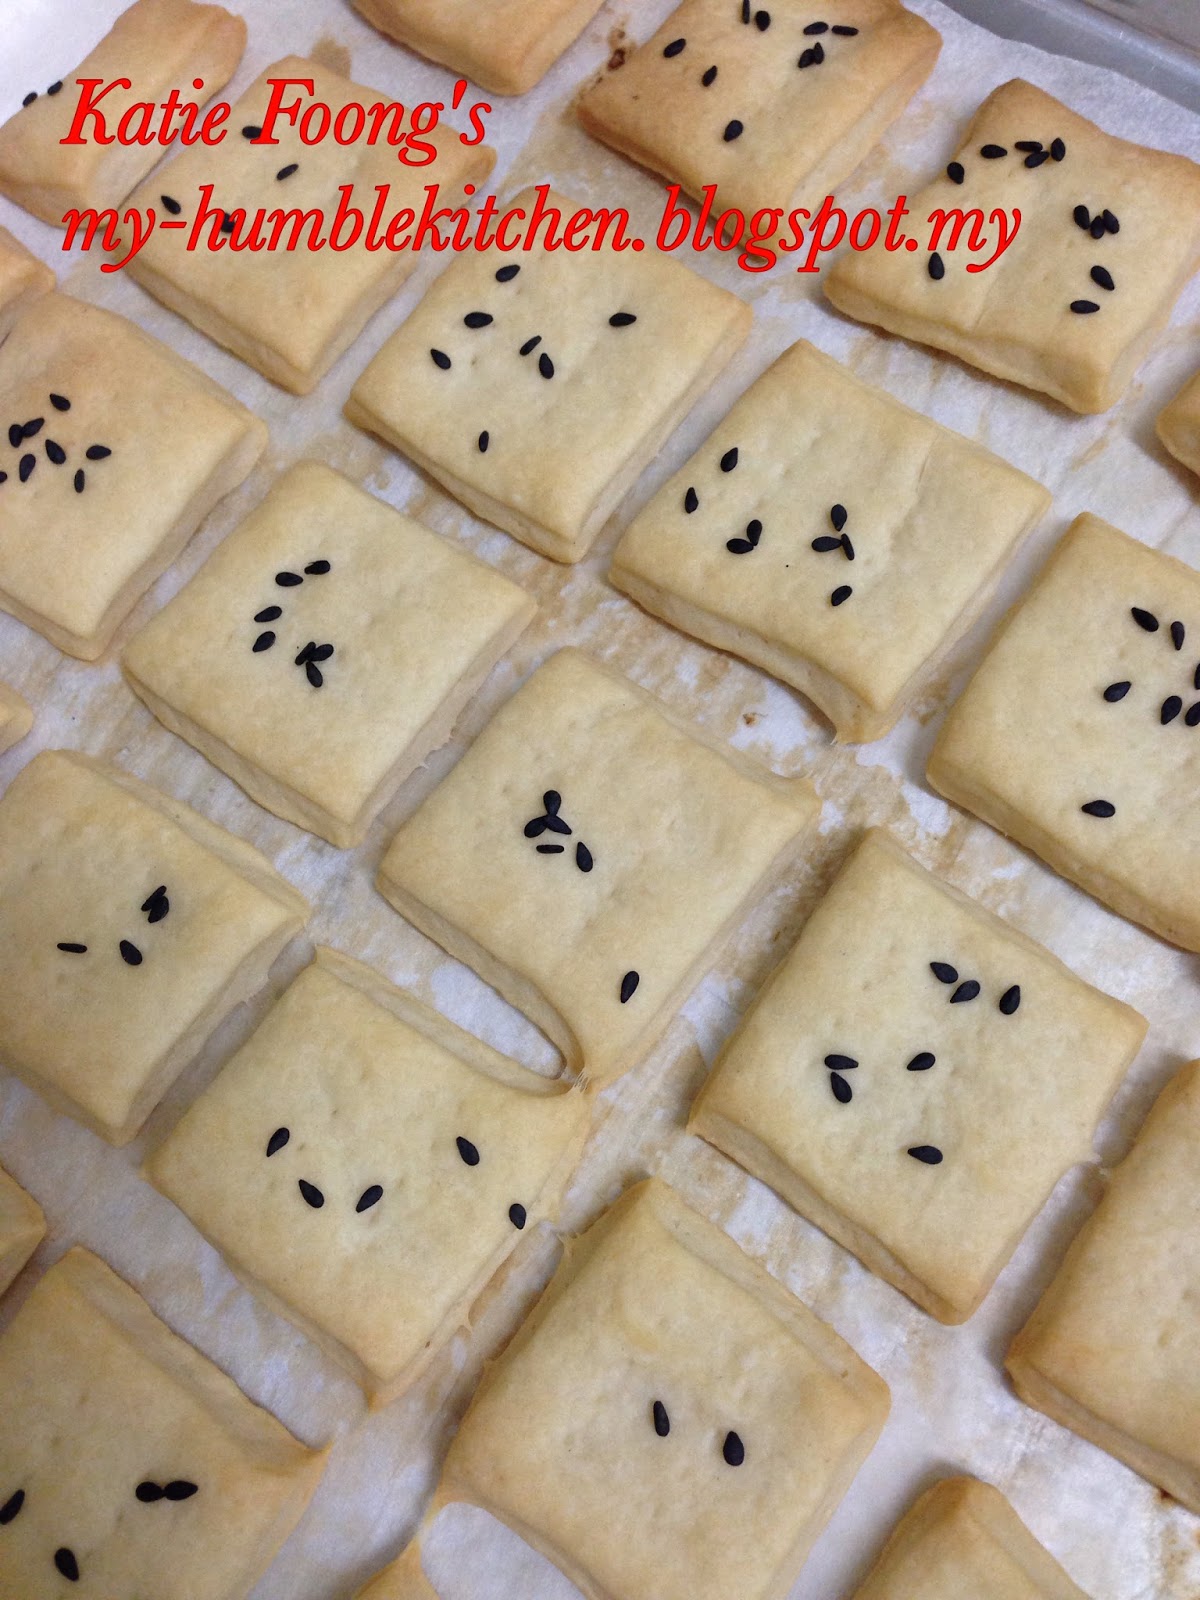
SOURDOUGH CRACKERS


Feeling uneasy to discard the Sourdough down the drain?
You can try this recipe

You can bake it the way you like it...
Thin and crispy
or
 slightly thicker,
with a tint of rosemary
or 
simply plain or salted
or
with added cheese


I tried to press in some black sesame seeds
after brushing with some oil
for added flavour


Here is the recipe taken from King Arthur Flour.com

Sourdough Crackers
(A) 113g King Arthur Whole wheat flour
       1/2 tsp salt
       248g discarded sourdough starter
       57g unsalted butter, softened to room temperature
       1-2 Tbsp dried rosemary or herbs of your choice (optional)

(B) oil for brushing
       coarse salt for topping (optional)

1) mix together all ingredients in (A) to make a smooth (not sticky) dough
2) divide dough in 1/2 & shape each half into a rectangle, cover & refrigerate 30min
    or more until dough is firm
3) preheat oven to 200'C
4) very lightly flour a piece of parchment & place the dough on it, 
    work with one piece at a time.
5) roll out to as thin as you want it, or 1/16" thick
6) transfer dough to a baking sheet & cut into squares of 1.25" with pizza wheels
7) prick each square with a fork & brush some oil on top
8) bake in preheated oven for 20min until golden.
9) yield: 100 crackers


Monday, 2 January 2017

SALTED EGG YOLK COOKIES


Salted Egg Yolk Cookies
is
an addictive melt-in-the-mouth cookie.

It is crumbly 
and melts in your mouth before you can bite into it!

Its unique taste,
a combination of both savoury and sweet,
is further enhanced with a hint of the aroma of salted egg

This recipe is adapted from Ann Low's

Salted Egg Yolk Cookies
85g butter, softened to room temperature
40g icing sugar
2 cooked salted egg yolk, mashed finely
125g plain flour
10g corn flour
1/8 tsp baking powder

Glazing: 1 egg yolk, lightly beaten
Topping: black sesame seed

1. cream butter & sugar till light & fluffy
2. mix in mashed salted egg yolk, mix well
3. fold in sifted flours & baking powder, briefly knead to form a soft dough
4. cover & leave in fridge for 30min for easy handling
5. roll dough between 2 plastic sheets, to 3mm thick
6. use cookie cutter to cut into required shapes & place on lined baking sheet
7. brush with egg wash & decorate with a few sesame seed
8. bake in preheated oven 170'C for 15min until golden brown
9. cool completely before storing


KUIH KAPIT


Kuih Kapit
fondly called Love Letter
is traditionally made and enjoyed 
during Chinese New Year Celebration

Nice to eat
but
not easy to make
as it takes a lot of effort and patience

For so many years,
my mother has been getting us children together
to make these Kuih Kapit
every year without fail

Kuih Kapit making is time consuming
It may take the whole day sitting in front of the hot charcoal stove!

Like most of the elderly
my mother does not have a recipe for Kuih kapit.
It is based on her memory, 
the look and the feel of the consistency of the batter.

The beauty of it 
is it works every time!

With my new toy
the electric Kuih kapit Toaster,
I have consulted her
and
through several trials and error
I have finally come out with this recipe

A word of caution:
This recipe works with the electric toaster
but may not work with the traditional tong method.

Kuih Kapit
50g rice flour
20g plain flour
10g tapioca flour
200g thick coconut milk, adjust consistency
1 AA egg
50g sugar
180g water, to adjust consistency of batter if necessary

1. beat egg & sugar
2. add coconut milk & mix well
3. stir in sifted flours, mix well & strain batter, allow to sit for an hour
4. heat up the electric toaster, oil the surface
5. pour 1.5 -2 teaspoon batter onto the centre of each mould, cover & toast
6. when colour turns brown, fold the biscuits into 1/2, then 1/4 while it is hot
7. leave to cool before storing
8. continue with the rest of the batter until finished

Note:
Electric toaster does not work as the traditional tongs,
so the following precautions need to be taken:
1. control the amount of batter pouring onto the mould 
    so that it does not overflow
2. not possible to make sure that it is a perfect round, 
    so need to use your artistic mind to fold it to look like one!
3. edges may not be smooth as you can see from the photo,
    if you are particular about it, trim it while it is still hot.

Sunday, 4 December 2016

PUMPKIN CRACKERS


Crackers are always welcomed
They are basically made with Tapioca flour

One drawback is that
it needs to be deep fried!

This is made with simple ingredients 
 kneaded together
steamed
sun-dried
and deep fried!

Long procedure but easy to manage, right?


Pumpkin Crackers
500g steamed & blended pumpkin
400g tapioca flour
1/2 tsp salt
1/8 tsp white pepper

1. knead together in bread machine for 15min
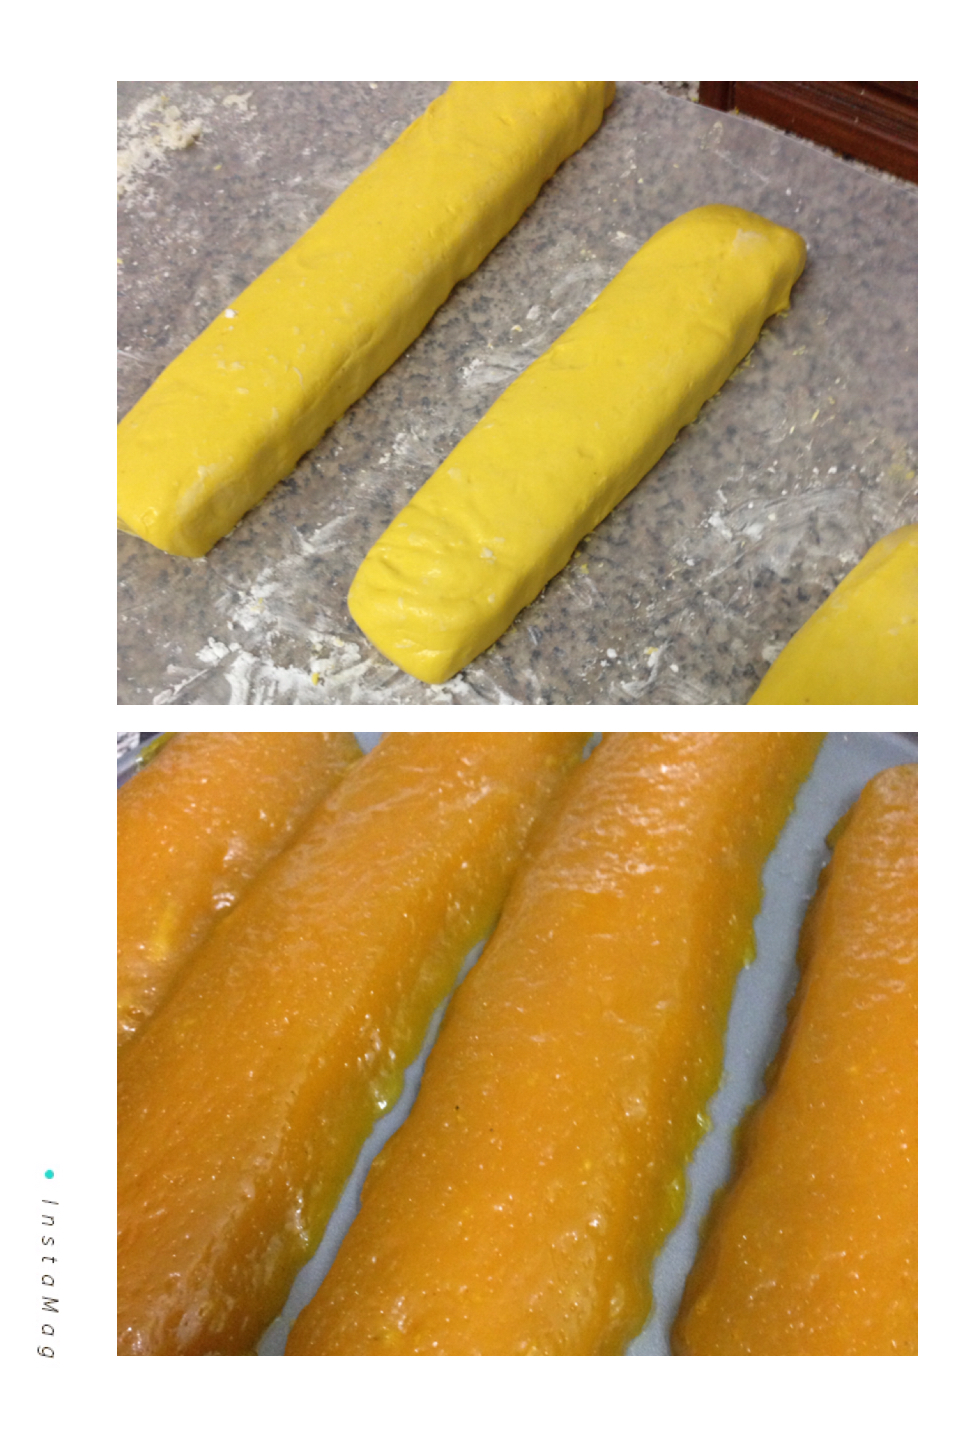
2. shape into logs as shown, and place on oiled tray
3. steam for 1 hour 10min  until well cooked, leave to cool
4. de-hydrate in the fridge overnight
5. slice thinly across & put in hot sun to dry (3-4 days)


6. keep in air-tight container until required
7. put in hot sun for an hour or so before deep frying to create the extra crisp


Sunday, 8 November 2015

BISCOTTI PECAN AND DATES


Biscotti
are easy to bake
and has no fats in it

Nice to dip in coffee or tea
and
can be baked in your choice of nuts and dried fruits 
to suit individual taste buds


I have chosen
dates

and pecan

following this recipe

Biscotti Pecan and Dates
100g cater sugar
2 eggs
1 tsp baking powder
1/4 tsp salt
230g plain flour
60g pecan, halved
75g dates, cut

1) beat sugar and eggs until thick and fluffy
2) in a separate bowl, whisk together flour, baking powder and salt
3) add in egg mixture and beat until well combined
4) fold in buts and dried fruits
5) transfer dough to a floured surface and form into a log
6) place log on parchment lined tray 
7) bake in preheated oven @ 180'C for 25min until slightly golden
8) remove and leave to cool for 15min
9) slice into 1/2" thick and lie cut side up on baking tray
10) bake in preheated oven 165'C for 10min both sides

Sunday, 25 October 2015

CHEESY CRANBERRY SCONES


Scones are easy to make
and 
it varies according to the ingredients 
and dried fruits added


350g plain flour
3 tsp baking powder
1/8 tsp salt
140g butter
100g cream cheese
30g fine sugar
3 Tbsp dried cranberries
3 Tbsp whipping cream
2 Tbsp milk
2 eggs, beaten

1) sift flour & baking powder, mix in salt
2) blend in butter & cream cheese, until mixture is crumbly
3) stir in sugar & dried cranberries
4) combine the rest of the wet ingredients & mix into the dry 
5) roll out dough to 2-3cm thickness, cut into circles
6) arrange on greased tray & bake in preheated oven 220'C for 15-20min
7) serve warm

Sunday, 20 September 2015

TAIWAN TAI YANG BING


太陽餅


Flaky Tai Yang Bing
cut in half


Freshly baked Tai Yang Bing
waiting to be cooled

Tai Yang Bing 
looks like 
Lao Po Bing
but 
these are pale looking

These are sweet 
stuffed pan cakes
in traditional flaky outer shell

It is famous in Taiwan
If your friends come back from Taiwan
they will surely give you a box or 2


The following recipe is adapted from
Alex Goh's Tai Yang Bing

Flaky Crust

A) Water Dough
      1/4 tsp maltose
      50g hot water (added to maltose to dissolve it)
      110g superfine flour
      15g caster sugar
      45g shortening

B) Oil Dough 
      75g superfine flour
      45g shortening

Filling:
20g maltose
1/2 Tbsp hot water (added to maltose to dissolve it)
80g icing sugar (can be reduced if do not like sweet)
25g superfine flour
20g butter

Method:
1) combine ingredients in 
      water dough, 
      oil dough & 
      filling SEPARATELY
2) divide each dough into 8 portions & roll into balls as follows:


3) flatten water dough & wrap oil dough inside
4) flatten ball lengthwise with palm of hand
5) roll out dough flat into rectangle
6) roll up as in swiss roll


8) press to flatten swiss roll, & roll out into rectangle again
9) roll up as in swiss roll one more time
10) fold swiss roll in half & press with palm
11) roll flat into round to wrap filling
12) seal the edge & place on parchment paper
13) bake in preheated oven 200'C for 12-15min

Notes:
1) Tai yang Bing in Taiwan is pale looking
     If you prefer the light colour you need to tent the biscuits
     5 min after baking i.e. before it turns brown!
2) If you like the golden colour:
    glaze with egg yolk + 1 tsp water before going into the oven


Sunday, 31 May 2015

CRISPY KUIH BAHULU


Have been wanting to bake some crispy kuih bahulu
but many of the recipes I tried were
soft little zi dang kao

Gathering the informations from various bakers
I have finally arrived at this:


Crispy Kuih Bahulu

160g plain flour (replaced 1 Tbsp with rice flour)
1/4 tsp baking soda
3 eggs, chilled
150g sugar
1 tsp vanilla essence
1/4 tsp salt

oil for brushing moulds

1) heat flours in the oven 150'C for 10min, turning half way, let cool
2) beat eggs, add sugar & salt, and beat until thick, pale & sticky
3) add vanilla
4) fold in sifted flours & baking soda (sifted together)
5) grease moulds generouly & heat up the moulds, must be very hot!
6) fill the kuih bahulu moulds until almost full
7) bake in preheated oven 180'C for 10-15 until golden brown
8) lift up kuih bahulu from moulds with a toothpick
9) clean moulds before the next batch, repeat No.5
10) store in airtight containers, can last for 2 weeks

Notes:
1) to make sure the moulds are well heated up before pouring
    in the batter. If not, the batter will stick to the moulds when baked.
2) When the mould get stuck with crumbs, clean the moulds!


Thursday, 29 January 2015

GROUNDNUT BISCUITS

Do you like these traditional Groundnut Cookies?

They are delicate to handle
and
they melt in the mouth in no time!


 Groundnut Biscuits
decorated with roasted peanuts


If you like it plain


Groundnuts are well loved
by my family

This biscuit
is a must when it comes to 
Chinese New Year baking

Without fail, every Chinese New Year
our eldest daughter, Chin
will ask for a tin of this
crumbly biscuits

It is easy to make
and 
fool proof too

Making small balls and pressing down lightly
on the baking sheet may sound easy


but I find using a cookie cutter
is faster and consistent in size too


400g groundnuts, toasted & ground till fine
330g plain flour
200g icing sugar
1 tsp salt
200ml oil (adjust consistency)
egg for glazing

1) mix all ingredients (should be lumpy) may not use up the oil
2) shape & bake @ 170'C for 12-15min

ARROW HEAD CHIPS


This Arrow Head Chips
is found in almost every home
during Chinese New Year

Arrow Head are easily obtainable 
as this is the season

Moreover
it is very easy to prepare too

Let's have a look


1 kg arrow heads (choose evenly sized, no breakage at base)
salt 
oil for frying

1) peel arrow heads leaving the stem to hold, soak in salt water
2) holding on to the stem, thinly slice the root and place on muslin cloth
3) heat oil & deep fry until golden, remove
4) store in air tight container when cooled