A Time To Share

Our God is a God of Nations:
"He so love the WORLD ... He gave His one and only son..."

Thursday 29 March 2018

SPICY BEAN SAUCE FOR FISH


Steam Fish
sounds like an easy task.

Not so, if you want it to be 
1) no fishy smell
2) nice looking
3) fragrant and tasty
and 
to top it all
4) it must be just done, not overcooked!

To achieve all these,
you need a good sauce 
and 
a little knowledge of steaming skill.

The secret is finally revealed by my sister-in-law 
Yvonne Ang

If you want a simple soya sauce, here is the recipe 
for Hongkong style steam fish.

A spicy one?
This is the popular酱蒸魚

Spicy Bean Sauce 
2 Tbsp old ginger, diced finely
2 Tbsp garlic, diced
2 Tbsp fresh red chilli, diced
2-3 chilli padi (spicy), diced
1 Tbsp taujoo, minced
1 tsp sugar
2 Tbsp cooking oil
1/2 cup water

1. heat up 2 Tbsp cooking oil in a wok
2. add ginger & garlic, fry until fragrant
3. add chilli & taujoo & continue frying
4. add 1/2 cup water & simmer.
5. add sugar to taste
6. done!

To steam fish
1. clean fish & steam fish until just done
    (how to check?)
    - if whole fish, the eye will come out  a bit.
    - if fish pieces, when chop stick can go through when poked.
2. drain away the water from the fish (remove smell)
3. pour the hot sauce over the fish, serve hot!

Tuesday 27 March 2018

COLLAGEN


Collagen
from pig skin has long been used in Chinese Cooking 
like soups and special dishes.

In fact, many of us are not aware that we are actually brewing collagen 
as in
1) Black Vinegar pig's trotter for confinement ladies 
2) Braised black sauce pork belly with eggs
3) Braised pig's tail with groundnuts 

All the above dishes come with a good portion of pork fats!

Elaine Teoh TP from Facebook
has shared with us this preparation of collagen minus the FATS!

It takes a lot of your time in cleaning & boiling the pig skin
but it is worth the trouble.

If you are keen, 
the ratio is: 1kg skin : 4L water

Method:
1) scrap and clean the skin with a knife
2) boil for 5 min
3) slice or scrap away the unwanted fats
4) bring a fresh pot of water to the boil, add the cleaned skin
5) when it boils again, turn the heat to simmer for 1.5hrs
6) the water will be cloudy
7) discard the skin & strain the liquid, removing any trace of oil too
8) let cool & put in fridge overnight to set like jelly
9) cut & keep in freezer


Notes:
1. can also use chicken carcass & chicken feet instead of pig skin
2. can eat it on its own
3. use it as thickening agent in your dish
4. add the soups

Sunday 25 March 2018

NONYA CHANG


My Nonya Chang
has lost its glamorous blue colour!

Traditional Nonya Chang has a distinctive sweet and savoury taste
with a patch blue glutinous rice 
coloured with blue pea flower juice.

Was my blue pea flower juice too diluted
or
was it the reflections
that make it lost its glamour?

I know it is definitely my fault.

I refer to Mykitchen101en for the recipe
and followed very closely.

First, I started with the spices.
Since I was told that this recipe is rather spicy,
I reduced the spices to 1/2!

If you are curious, here is how I did it...

Spices:
I used 1/2 of the following amount
25g coriander seed
20g white pepper seed

1. combine both seeds in a frying pan
2. stir fry until fragrant 5-6 min, let cool
3. blend the seeds until fine, sift & discard any coarse leftover


Pork Filling:
450g skinless pork belly, diced
30g mushroom, soaked & diced
110g winter melon sugar, diced
4 Tbsp cooking oil
60g chopped shallots
40g chopped garlic
35g minced bean paste/taucu
40g sugar

Note
to make dicing easier, blanch the pork belly in hot water for 2 min to firm up


1. preheat frying pan, add oil & fry shallots & garlic until golden brown
2. add bean paste & cook until fragrant
3. add pork, cook until the outer layer turns white
4. add mushroom & continue cooking for 1 min
5. add spices gradually, mix well
6. add winter melon & season to taste
7. divide the filling into 12 equal parts


Ingredients for Glutinous rice
500g glutinous rice, soaked for 4 hours, drained
1 Tbsp cooking oil
25g chopped shallots
1 tsp fine salt
200ml mushroom soaking water
3 Tbsp thick blue pea flower juice


1. preheat frying pan, add cooking oil, fry shallots until fragrant
2. add glutinous rice and cook for 1 min
3. add salt to mushroom soaking water, mix well
4. add this water gradually to glutinous rice while stir frying
5. cook until water has dried up
6. dish out 600g of rice, divide into 12 portions
7. add blue pea flower juice to the remaining rice & cook until dry
8. divide into 12 portions too

Wrapping:
24 pc bamboo leaves, soaked & cleaned
some strings to tie, soaked
6 pieces pandan leaves, cut into halves 

1. fold 2 pieces bamboo leaves into a cone, add 1 pandan leaf
2. put one portion of blue colour rice into the cone, press down
3. add with one portion of the filling
4. top with a layer of white rice
5. use a wet hand to press the rice until firm
6. fold to shape & tie with a string


Cooking:
1. bring a large pot of water to the boil
2. put in the dumplings, the water level must be higher than the dumplings
3. bring to a boil again, reduce to medium heat, cover & cook for 2 hours 30min
4. if using the pressure cooker, use bean function.

Notes:
1. cooled dumplings should be refrigerated
2. can be freezed up to 3 months

NONYA APOM BERAS


Nonya Apom Beras
a traditional rice pancake
with sweet filling, peanuts & banana

Sorry my photo does not look as appetizing
but I can tell you it is soft and fragrant
and 
it is definitely yummy if you are a fan of Nonya kueh.

As the author of  this recipe of kristygourmet.blogspot.com says,
you will be fascinated how beautiful this apom looks,
with holes all around!

I am afraid I fail to show clearly the special feature in my photo.
Luckily I have one while still in the frying pan.


This Nonya version of apom is thicker and more like a western pancake.

This is kristy's recipe (I have reduced the portion), if you wish to try:

Nonya Apom Beras
(A) 1/4 tsp yeast
      1/4 tsp sugar
      15g water

(B) 75g rice flour
       1/2 tsp glutinous rice flour
       1/2 tsp tapioca flour
       1/8 tsp salt
       125g coconut milk

(C) 15g rice flour
      100g coconut water
      1 pandan leaf, knotted, optional


(D) 1 Tbsp blue colour from blue pea flowers


Method:
1. mix togther (A) and leave aside for 15min until frothy
2. combine ingredients (B)
3. mix ingredients (C) & heat over medium flame to get a smooth paste, let cool
4. combine and mix well all 3 (A) (B) (C) & leave aside for 2 hours
5. remove 1/2 cup of the mixture & add blue pea colour to it
6. heat up a frying pan, rub surface with a little oil
7. pour 2 Tbsp of batter onto the pan & cook uncovered, over medium heat till bubbles appear
8. add some blue colour batter on the apom, gently swirl with a chopstick
9. the apom is done when it is no longer sticky, pick up & serve 

Note:
These can either be served with filling as I did
or serve with curry if you like.

HOMEMADE TOMATO SAUCE

Tomato Sauce
made from fresh tomatoes, anyone?


It looks like I am wasting my time
when I can get a big bottle at a fraction of the money.

If you have tasted it,
you will agree with me that it is simply delicious
and 
you can adjust the taste to your liking,
no artificial colouring and addictives!

Of course,
to get the best of it,
make it when tomatoes are in abundance and going cheap!

Here are the 2 tubs I made with 700g ripe tomatoes!


Thick and creamy Tomato Sauce.
You can further thicken it if you stir it longer over medium heat.

If you are keen on the recipe
which I have adapted from Hebbarskitchen.com....


Homemade Tomato Sauce
700g fresh ripe tomatoes
1 tsp salt
2 tsp sugar
1/2 tsp vinegar


1. boil cleaned tomatoes in boiling water for 3 min, remove
2. blend until smooth
3. strain into a saucepan
4. bring to a boil, stirring occasionally 
5. once boiled, add salt & sugar, continue cooking & stirring 
6. when it has reached the required consistency, off heat & let cool
7. store refrigerated.

Note:
It takes about 30min cooking & stirring occasionally

Thursday 22 March 2018

CHINESE RADISH CAKE

Chinese Radish Cake

Some like to call it Turnip Cake even though there is no turnip in it!


 Lo Bak Gou is the other name
in Cantonese dialect,
is specially steamed for Chinese New Year celebration.

To some elders,
Lo Bak Gou is a tradition that signifies abundance
as it is normally steamed in big trays.

So much so that, 
it will last through the first few days of  Chinese New Year.

As such, during this auspicious time,
many Chinese families still have
a large tray of Lo Bak Gou
at home because it can be easily served,


either pan fried,


stir fried or simply re-steamed!

Today, Radish Cake is easily available
in most Dimsum Restaurants.
Simple it may look,
but it is full of flavour!

My mom loves lo bak gou
and she never fails to order one
whenever she goes for dimsum breakfast.

The beauty of this Lo Bak Gou
is that it can be easily made a day ahead,
then
heat up & serve when required.

Chinese Radish Cake
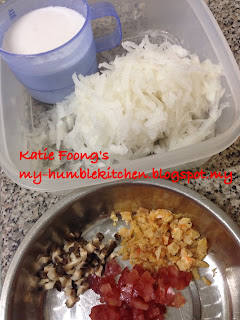
A) 1 cup radish, grated

B) 1/2 cup water
     1/2 cup rice flour (3/4 cup if you like it harder)
     1/2 Tbsp corn flour

C) 1 Tbsp oil
     1 Tbsp dried shrimps, soaked & chopped
     1 dried mushroom, soaked & chopped
     1/3 chinese sausage, diced
     pinch of 5 spice powder
     salt & pepper to taste
     1 Tbsp fried shallots

D) 1 scallion, chopped
     1 red chilli, chopped


1) mix flours in water & leave aside
2) heat up 1 Tbsp oil in a wok
3) add dried shrimp, mushroom, sausage to fry until fragrant
4) add radish and cook until soften
5) add 5 spice powder, salt & pepper and fried shallots
6) stir in flour mixture, and cook until mixture thickens, turn off heat
7) scoop into a well oiled pan to steam for 45 min until cooked
8) let cool & loosen side before turning it onto a cutting board


Tuesday 20 March 2018

SALTED EGG POWDER


Salted Egg Powder

I love salted eggs.
I make my own salted eggs with duck eggs.

In my eagerness to try making some salted egg powder,
I referred to Guaishushu1.com for this recipe.

When it was finally done, 
and 
while recording the recipe,
I realized that I have wrongly read his recipe,

'20 salted egg yolk & 20g milk powder'.

Instead, I have used:
50g salted egg yolk (3 yolks)
50g milk powder

Method:
1. clean salted egg yolks, make sure no whites is attched to the yolk
2. bake the salted egg yolk in a preheated oven 150'C for 10min
3. mash the yolks & continue baking another 5 min until cooked
4. blend together the baked salted egg yolk with milk powder, until fine
5. bake again @100'C for at least 30min, with oven door slightly ajar to air dry 
6. spread out the egg yolk powder & leave in the fridge for 1 night
7. sift and store in the fridge in air tight container.
    If you prefer it drier, leave in fridge with caps open to draw out remaining moisture

Update:
The final product looks good as you can see in the photo. 
It is also aromatic. I may get a different taste when cooking
some savoury Chinese dishes with it. Other than that, I think
it should be fine. Will update you if I encounter any problem
using it. In the mean time, keep my fingers crossed.

Sunday 18 March 2018

HOKKAIDO SNOW BREAD


Hokkaido Snow Bread
shared by Madeline Yeo on Facebook


Hokkaido Snow Bread
is a rich bread,
combining whipping cream, butter and milk.

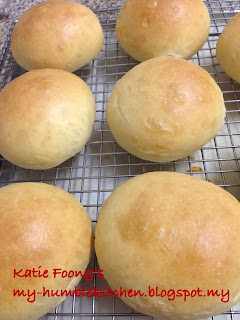
It is wonderfully spongy and soft.

Hokkaido Snow Bread
70g whipping cream
120g fresh milk
1 large egg
1/2 tsp salt
20g sugar (I added extra 20g)
320g bread flour
1 tsp yeast
50g unsalted butter 

Method
1. all ingredients into the bread machine, bread dough cycle 1.5hrs
2. divide dough into buns or loaves
3. shape, and leave aside for 2nd proofing, 1 hour
4. brush top of bun with fresh milk
5. bake in preheated oven 175'C for 25min for buns, but 35min for loaves

HERBAL WATER KEFIR

Introducing to you 2 herbal Water Kefir Drink
for both your guts and your eyes!

These are very refreshing! 


(1) Wolfberries/Gojiberries & Osmanthus buds


(2) Wolfberries/Gojiberries & Chrysanthemum buds

Wolfberries or Gojiberries
has long been used to improve eyesight,
strengthen vision and moisten dry eyes.


Osmanthus Buds 
besides complementing Gojiberries with the same function,
it also helps to improve skin complexion!
One stone kills 2 birds!


Chrysanthemum Buds 
is good for treating blurred vision, dry and sore eyes,
especially for those working in front of computers.

How about incorporating some of these Chinese herbs into Water kefir
instead of boiling and steeping them in hot water?

Simply add some into Water Kefir during 2F,
and you will have a health drink
for your guts and your eyes
and 
improved complexion!

CHWEE KUEH

CHWEE KUEH

is a popular breakfast treat in Singapore.

It is easily available in markets and food courts.
It was there that I first tasted it...


Chwee Kueh
40g rice flour
1/2 Tbsp corn flour
1/4 tsp salt
1/2 tsp cooking oil
60g water
60g boiling water

1) oil 6 pieces tart moulds, and steam in a hot steamer
2) combine rice flour, corn flour & salt with water
3) add boiling water & oil, mix well
4) pour into heated moulds & steam for 20min
5) allow to cool before removing from moulds


Chwee Kueh is served with a preserved radish topping.
It can be easily prepared as follows:

Filling:
1/2 pkt preserved radish, chopped
2 garlic, minced
1/2 Tbsp dried shrimps, soaked & chopped
1/2 Tbsp cooking oil
soya sauce, sugar and pepper to taste
some dark soya sauce, optional

1. heat oil in wok, fry garlic & dried shrimp until fragrant
2. add preserved radish & fry until quite dry
3. add a little water and allow to simmer
4. add seasoning, and a pinch of wheat flour
5. dish up & scoop onto chwee kueh and serve.

YAM KAU YUK

Yam Kau Yuk
is a popular dish in the coffee shop, or joo chou shop.

These Yam Kau Yuk bowls take long time to steam to perfection. 
The meat should be soft and tender,
whereas, the yam must remain in pieces!

They are usually prepared days ahead and frozen until required.

I love kau yuk.
So whenever I cook this dish,
I will cook an extra bowl to freeze.


Yam Kau Yuk
Spread out to see the pork belly and soften skin attached


Yam Kau Yuk
 can either be done in a slow cooker,
or 
as the first photo, steamed in an electric lunch box.

Yam Kau Yuk

1 pc Pork Belly (2"x 4")
         - lightly fried whole in oil & sliced 1/2" thick
            (can use roast pork belly, no need to fry)

Yam - peeled & sliced 1/2" thick & fried in oil
                            

Other ingredients
1 Tbsp oil
2 shallots - sliced
3 pips garlic - minced

Sauce:
mix together in a small bowl
1 cube red fermented curd, tau joo- mashed
1.5 cup water
1 Tbsp oyster sauce
1/2 Tbsp sugar
2 Tbsp soya sauce
1/2 Tbsp dark soya sauce, optional
pepper


Method:
1) Arrange (alternating) yam & pork slices in a steaming bowl
2) heat oil, fry shallots & garlic until fragrant
3) add the bowl of sauce, simmer awhile
4) pour sauce over the pork 
5) steam or double boil in an electric lunch box 
     or slow cooker for 1.5 hours, until done.

Sunday 4 March 2018

BAUMKUCHEN


While the bloggers were excited over Indonesian layer cake
Barry Apek has come up with 

Baumkuchen.

This is a layer cake 
baked with less egg & butter,
as such it is not as rich as the Indonesian Layer Cake.

As Barry Apek puts it,
the taste is absolutely heavenly, even without the chocolate ganache.

This is only a 7" cake.
It was finished before I could cook the ganache.

Perhaps you may like to try your hands on it:

Baumkuchen

(A) Almond Paste (100g)
55g almond meal
26g caster sugar
8g honey
11g hot water

(B) Cake
125g butter
2 yolks, 4 whites
50g caster sugar
60g icing sugar
75g corn flour
55g cake flour
1 tsp vanilla extract
1/2 tsp salt
1/4 tsp cream of tartar

(C) Chocolate Ganache
80g chocolate
120g whipping cream
1 Tbsp golden syrup

Method:

1) combine all ingredients of almond paste (A) 
2) and give it a blitz in the blender until fine, leave aside
3) beat butter together with icing sugar, vanilla extract & salt until light & creamy
4) add yolks & continue beating until fluffy
5) add almond paste & beat until incorporated, set aside
7) Beat egg white, cream of tartar & sugar until stiff and glossy
8) fold into egg batter
9) gently fold in sifted flours in 3 additions
10) scoop some batter into a lined 7" square tin, spread evenly
11) bake using grille mode 200-225'C until brown (about 3min)
12) scoop the next layer, continue until the batter is finished.
13) when done, leave on rack to cool before unmoulding
14) trim off the edges of the cake & set aside in fridge to cool

Ganache
1) gently heat cream to just boiling
2) pour into chocolate, and leave for a minute before stirring until even
3) add syrup & stir until smooth
4) place cake on a cooling rack
5) gently pour the ganache over the cake, let it run over the side 
6) use a spoon to gently guide the flow of chocolate
7) leave it to set

APOM MANIS


I like hawkers' food

Apom Manis is one that I like most.
I still remember so many years back for RM 1 I can get 4 pieces
Now, I can only get 1 piece!

In fact I have been trying to make some but failed many times.
I want it to be as thin as the hawkers selling.
I want it to be crispy on the outside and soft on the inside.

I used uncooked rice, cooked rice, fermenting it overnight,
the procedure was long and tedious!

After many failed trials, I opt for rice flour
and 
short hours of fermenting.

If you are a fan of Apom Manis, you may like to try your hands on it.

Apom Manis
7 Tbsp rice flour
2 Tbsp plain flour
1 egg
1 Tbsp sugar (can add more if you have a sweet tooth)
1/8 tsp salt
150g coconut milk (no need thick, can be diluted)
1/4 tsp instant yeast

1. mix all ingredients and leave aside to proof for 2 hours
2. strain the mixture, and you are ready to fry
3. heat up a small wok and oil it for the 1st or 2nd piece so that it will not stick
4. pour a small ladle of batter into the wok & swirl the wok, like the hawkers do
5. cover & let cook until the sides starts to brown.
6. you may remove once cooked
7.  if you like it brown on the other side, just turn and cook the other side
8.  enjoy

NONYA KAYA POTONG

Nonya Kaya Potong


We are familiar with Kaya spread on toast. 

All heads turned when Rosalind Chiew posted this 
Nonya Kaya Potong.  

This nostalgic Kaya Potong is steamed
in Jacobs cream crackers rectangular biscuit box 
which many of us are familiar with. 

Many of those who know about this seri Kaya, 
gave thumbs up for it, 
while others like me were eager to try steaming one! 

Thank you Rosalind Chiew for this recipe. 
Curiosity has made me rolled up my sleeves 
and 
stand by the stove stirring. ....

Ingredients:
 1:1:1 ratio 
of eggs : white sugar : santan.

1 pandan leaf, cut

Note
1. I used only 2/3 of the amount of sugar
2. Duck eggs are recommended for better taste
      

Method:
  1. Stir the eggs & sugar till combine.The mixture will be smooth & slightly shiny.
  2. Sieve into a bowl. 
  3. Add 1/2 of the santan & continue to stir over stove using double boiler (baine maire).

4. Add the remaining santan slowly & pandan leaves, continue to stir till all sugar dissolve.
5. Continue stirring till the mixture is slightly thicken (abt 1hr ) 
6. Remove from baine maire & pour into a parchment lined steaming tray 

7.

7. Cover with parchment paper & aluminium foil.
8. steam in a slow cooker @ low temp for 8 hrs 
9. Let it cool before cutting.